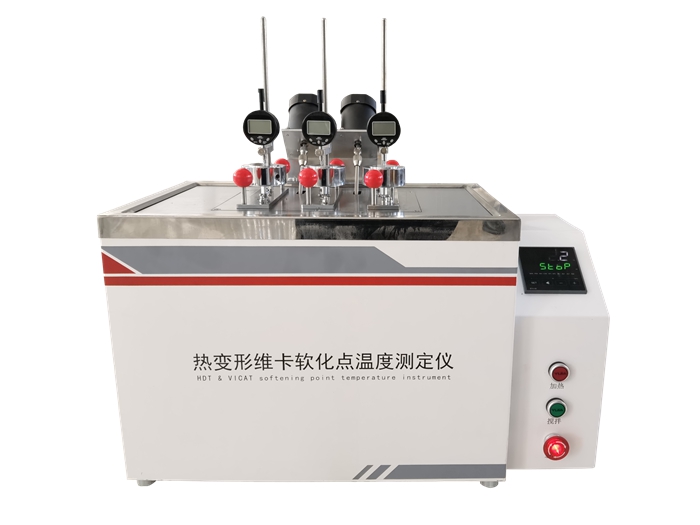
XRW-300A-3 series
Thermal deformation, Vica softening point temperature tester A
One, use
XRW-300A-3 series thermal deformation, Vica softening point temperature tester is mainly used for non-metallic materials (such as plastic, rubber, nylon, electrical insulation materials, etc.) thermal deformation and VICa softening point temperature measurement. It is an ideal test tool for chemical enterprises, scientific research units, colleges and universities, etc.
Ii. Features
The instrument conforms to the requirements of ISO75-1974, ISO306-1974, GB1633-79, GB1634-79 standards, and can realize real-time display, temperature control, measurement, alarm and other functions.
Three, the main performance indicators of the instrument
3.1 Temperature control range: room temperature ~ 300℃;
Heating rate: 120℃/h, 50℃/h;
Maximum temperature control error: (12+1) ℃/6 minutes (thermal deformation test);
(5+0.5) ℃/6 minutes (Vica test);
3.4 Maximum deformation measurement range: 1mm (Vica test);
Maximum deformation measuring range: 0.33mm (thermal deformation).
3.5 Number of sample racks: 3;
3.6 Heating medium: methyl silicone oil (less than 200 cess);
Maximum heating power: 3kw;
3.8 Cooling method: natural cooling;
Three methods of load deformation temperature: Method A: 1.80Mpa bending stress, method B: 0.45MPa bending stress, method C: 8.00MPa bending stress
3.10 Mass of load rod and pallet: 68g+1g;
Four, characteristics
The temperature signal felt by the temperature sensor is input to the amplifier, through the analog switch, A/D conversion input temperature control meter, by running the PID program (in the instrument) to give the corresponding heating parameters, control the heating time of the heater, so as to achieve the purpose of temperature control, so that the test can be carried out safely and reliably, thus ensuring the safety and reliability of the test. The biggest feature is that the operation is convenient.
Five, the equipment standard configuration
|
Name |
Quantity |
Parameters |
|
Test rack |
3 |
The span of the test frame is divided into two 64mm and 100mm test methods |
|
Displacement sensor |
3 |
Measuring deformation error ±0.005mm |
|
Temperature sensor |
1 |
Us import measurement error ±0.5 ° C |
|
Hot deformation indenter |
3 |
The radius of the arc is R3 |
|
Vika tests the press pin |
3 |
1mm cross-sectional area |
- Weights
|
Name Specifications |
A |
B |
C |
D |
E |
F |
G |
H |
I |
J |
K |
|
Mass (g) |
1000 |
932 |
500 |
200 |
100 |
50 |
20 |
10 |
5 |
2 |
1 |
|
Number of pieces |
12 |
3 |
3 |
6 |
3 |
3 |
6 |
3 |
3 |
6 |
3 |


 冀公網(wǎng)安備 13080502000095號


